The “SOS Only” warning that appears in the status bar on an iPhone is likely recognisable to its users. In iOS 16, this notification appears to the right of the status bar, whereas in prior versions of iOS, it appeared to the left.
What does “SOS Only” stand for, then? After seeing that notification on your iPhone, what can you do?
This guide will help you understand the “SOS Only” notification and how to fix it. So, continue reading!
What Does “SOS Only” Mean on the iPhone?
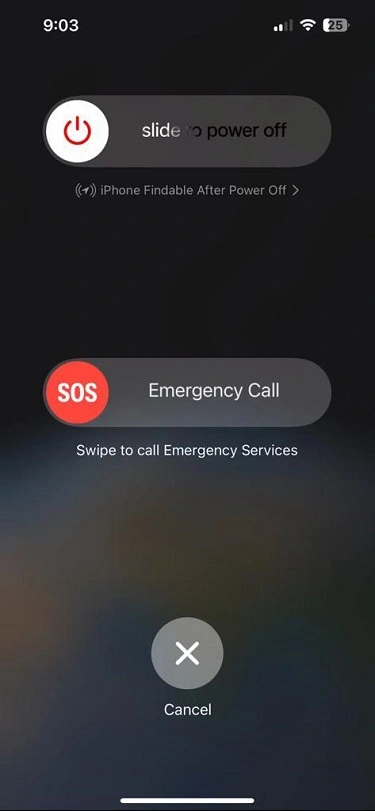
The “SOS Only” message will show in the upper right corner of your screen anytime your iPhone is out of cell phone service. This text appeared in the upper left corner of the display on iOS versions prior to iOS 15.
When an iPhone user is outside of North American network coverage, they may get a “No Service” text message.
However, your phone’s SOS alert may not be caused only by a lack of cellular coverage. It might also show up if the SIM card isn’t installed correctly or is broken.
If you’re using cellular roaming and haven’t paid for extra data or a calling subscription, you may get this warning instead. When your iPhone is in an area with no cell service, the “SOS Only” message will appear.
How to Fix SOS Only Message on an iPhone?
Your iPhone will no longer display the “SOS Only” message as soon as it connects to a cellular network. You can make it happen by following these instructions.
1: Restart Your iPhone
A quick restart of your phone usually solves network problems. This will fix any lingering bugs and ensure smooth operation in the background. To force restart your iPhone, just press and hold either of the volume buttons, as well as the side button, and then move the slider when it appears.
2: Turn Off and Turn On the Data
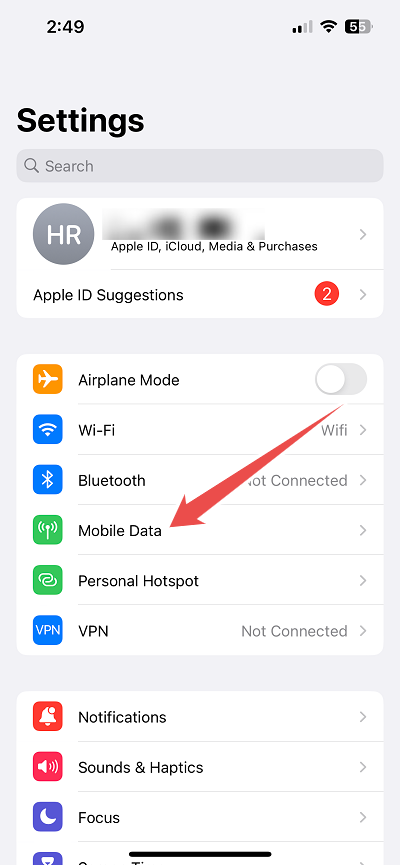
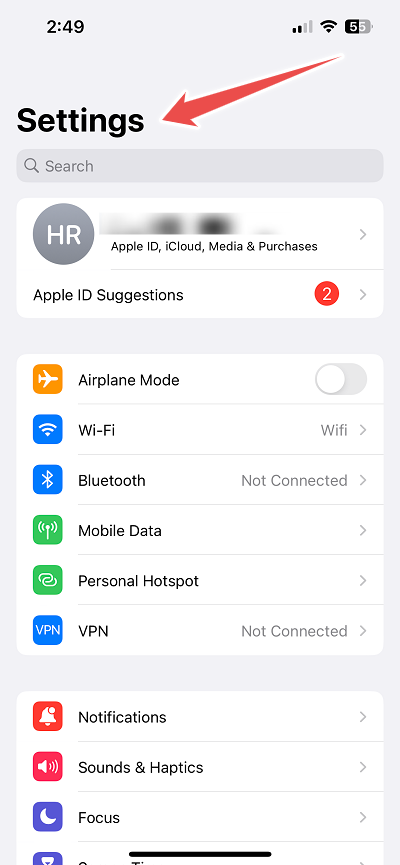
- Go to the Settings
- Tap on Mobile Data
- Now, Turn the Toggle Bar Off for Mobile Data Wait for a Couple of Seconds and Now, and Turn it Back.
Alternatively, you can manage this by toggling the “Mobile Data” icon in the Settings menu.
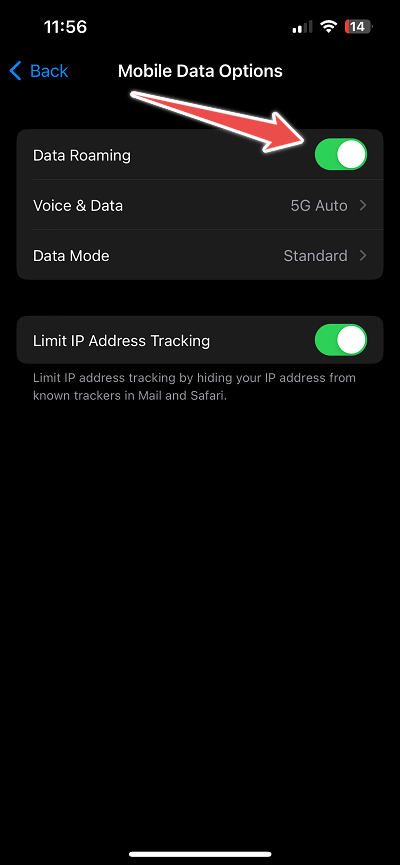
Part 2: Turn on Data Roaming
- Go to the Settings and Tap on Mobile Data
- Here, You’ll Need to Turn on Toggle Bar for “Data Roaming“.
3: Check and Update Network Settings
Your iPhone’s carrier settings are automatically updated at regular intervals. If you haven’t updated in a while, you may have problems with your phone’s connection to wireless networks. Here’s how to perform a manual update.
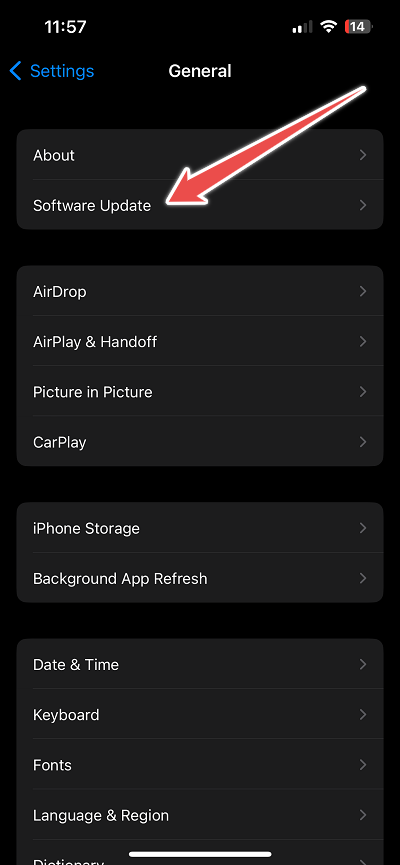
- Go to the Settings
- Tap on General

- Now, Scroll Down and Select About
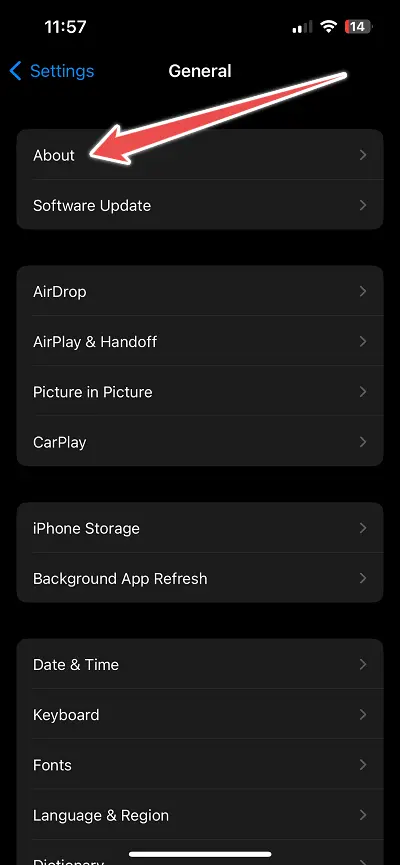
If there are any upcoming changes, they will be shown here. Also, update your software if there is one available.
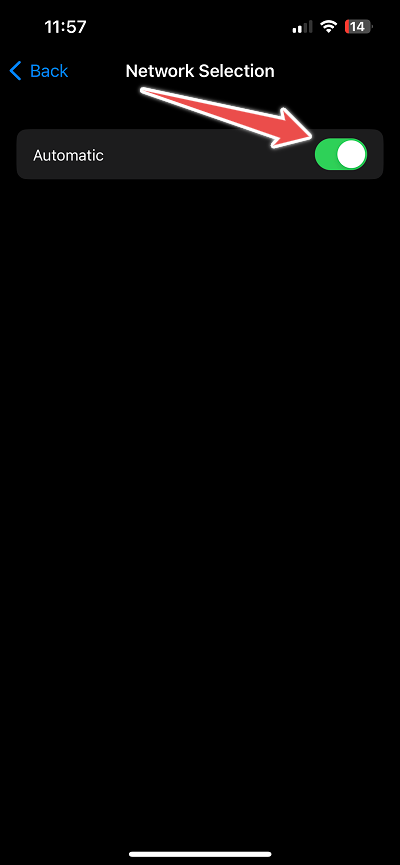
4: Check if Automatic Network Selection is Active
It’s possible you accidentally went with the incorrect network. To prevent future difficulties, enable “Automatic network selection.” To activate the auto-selection of networks, do the following:
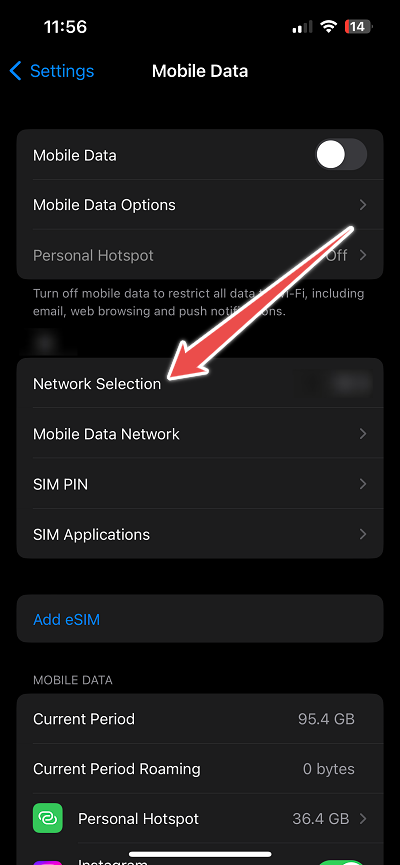
- Go to the Settings
- Now, Tap on “Mobile Data“
- Here, Choose the “Network Selection” Option
- Turn on Toggle Bar for “Automatic“.
5: Update Software
There is a possibility that an iPhone software glitch is preventing it from accessing network service. If this is really the case, Apple will promptly address the issue by releasing an updated version of the relevant software.
You may upgrade your iPhone to the most recent version of iOS by going to Settings > General > Software Update.
6: Reset Network Settings
Resetting your network will restore it to its original, factory configuration. Your modifications won’t create any problems anymore. All Wi-Fi and Bluetooth pairings will be removed if the network settings are reset.
To access previously associated networks and devices, you will need to input the password again. The iPhone’s network settings can be restored by following these steps.
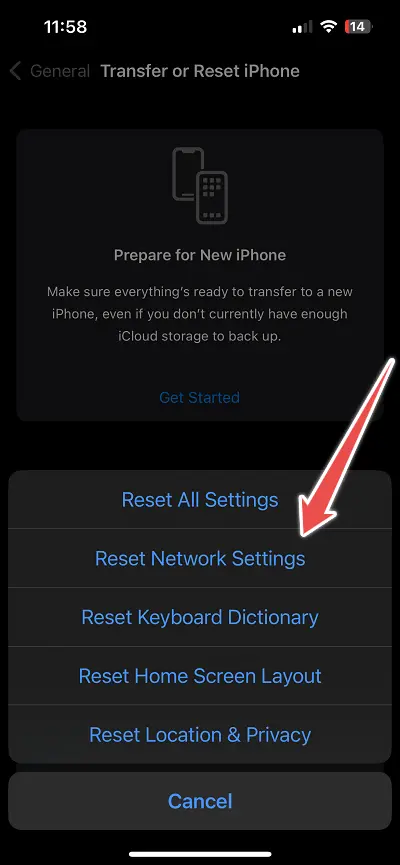
- Go to the Settings
- Tap on General
- Scroll Down and Find “Transfer or Reset iPhone“
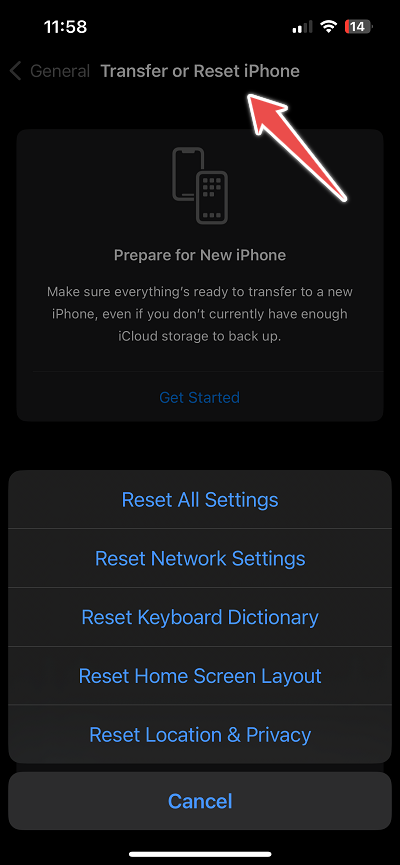
- Choose “Reset” after Tapping on “Reset Network Settings“.
Conclusion
By using these steps, you will be able to disable the “SOS Only” message and restore network connectivity on your iPhone.
Whether you run into this problem or not, you should also check to see whether the network carrier is going through a temporary interruption.
This is something you should do as soon as you find the problem. So, if you’ve exhausted all your options and your iPhone still isn’t receiving any network signals, it’s time to call your service provider.
