Oh no! What is it? A large exclamation mark! This may be quite frustrating when attempting to share photos with loved ones and friends on Facebook Messenger and all you see is a large warning message that reads “try again.”
Trust me! You are not alone in this. We have all experienced this once in our lives. Facebook Messenger often misbehaves by showing unread messages while sharing online media files and images. You don’t want to miss out on this enjoyment.
This typically occurs when the server is experiencing problems, when cache and data are full, or when the time and date are out of sync.
However, do not worry, as we are here to help you resolve this issue and get your social media life back on track.

Fix Facebook Messenger Not Sending Pictures
We have compiled a list of solutions that may help you resolve the issue that Facebook Messenger cannot transfer photos issues and alleviate your concern.
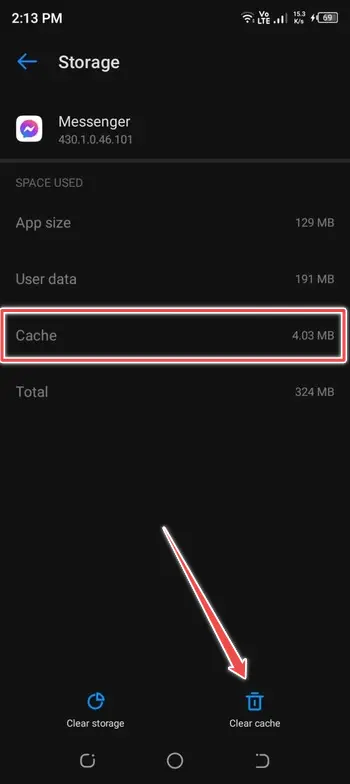
1. Clear the messenger cache
Follow the instructions below to remove the Android Messenger cache.
- Launch the Messenger app’s from the application manager.
- Select Storage from the menu.
- Select Clear cache at the bottom of the page
2. Analyze Permissions
In order to repair this, please follow the guidelines below:
- Enter Settings and search for Apps.
- Now, go to Manage Apps / App Settings and locate Facebook Messenger.
- Verify that you have allowed all rights except those pertaining to location, SMS, and Contacts. Ensure Camera and Storage permissions are permitted.

3. Disable Data Saving Mode (Android)
The following stages will assist you through the procedure:
- Tap the Messenger icon in the app menu to activate it.
- Tap your Profile in the upper-left corner to access your settings.
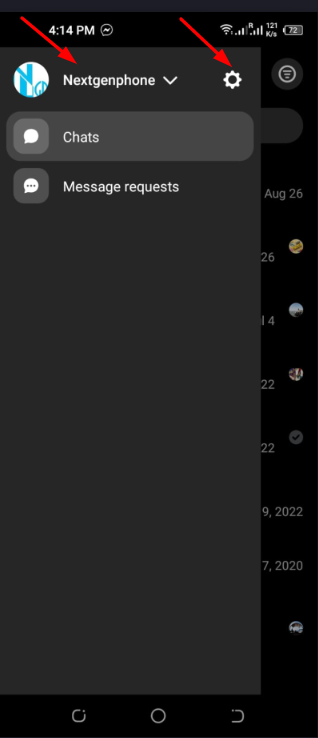
- Under the Preferences menu, tap Data Saver to deactivate it.
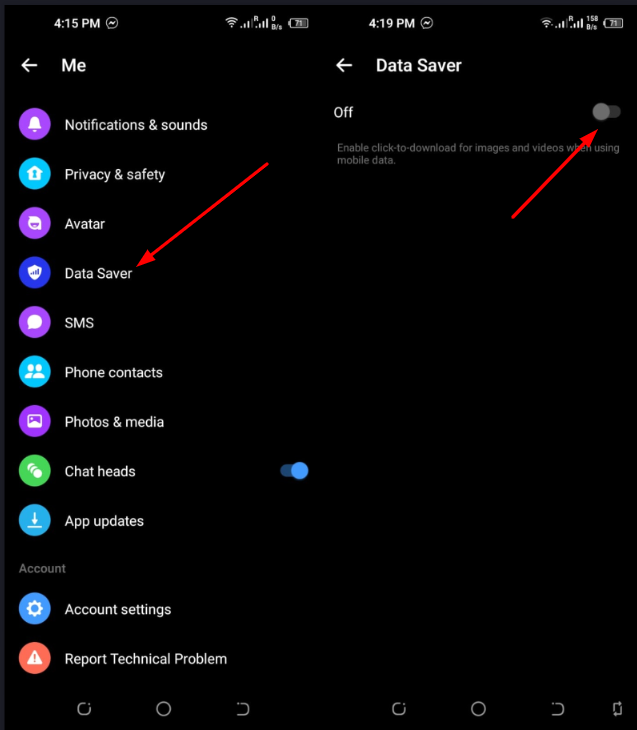
After that, restart the application and verify whether you can again transmit photographs.
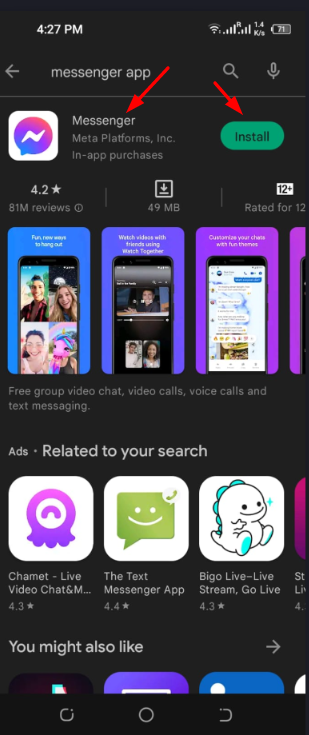
4. Reinstall the Messenger
The steps to do so are outlined below:
- Navigate to Settings and locate Apps.
- Next, go to All Apps/Manage Applications and choose Messenger.
- Remove the application from there and delete all cache and data history.
- Return to the Play Store and install Facebook Messenger again.
- Rebooting your device is not required. After completion, log in again.
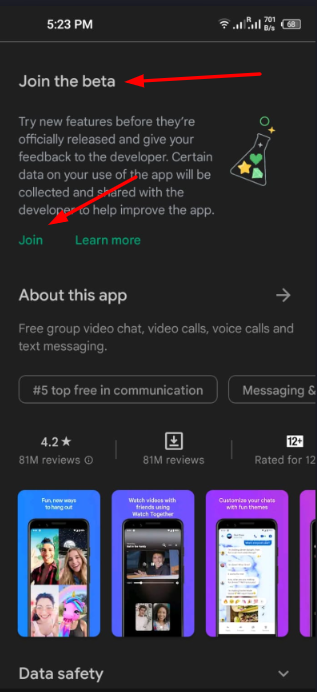
5. Leave the Beta program
If you are unsure about how to exit the Facebook Messenger Beta program, please review the following steps:
- Open the Play Store and go to Facebook Messenger.
- Scroll down until the You’re a beta tester part is shown.
- Select the Leave button and wait to be removed from the Beta programme.
- Reboot your mobile device and update Messenger.
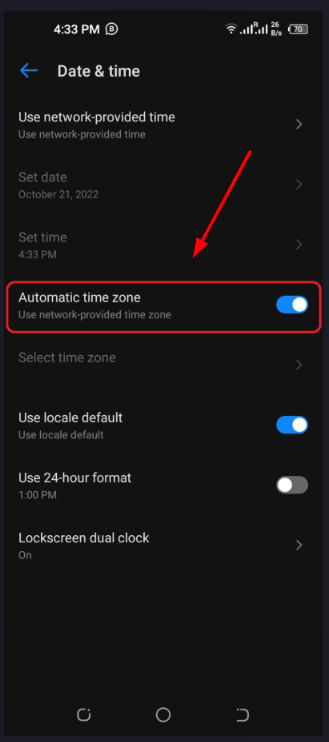
6. Check Date & Time Settings
To verify your time and data settings, please follow these steps:
- Click System or Further Settings from the Settings menu.
- Look for the date and time option now.
- Ensure that the toggle next to “Automatic date & time” is on.
- Lastly, restart your Android device.
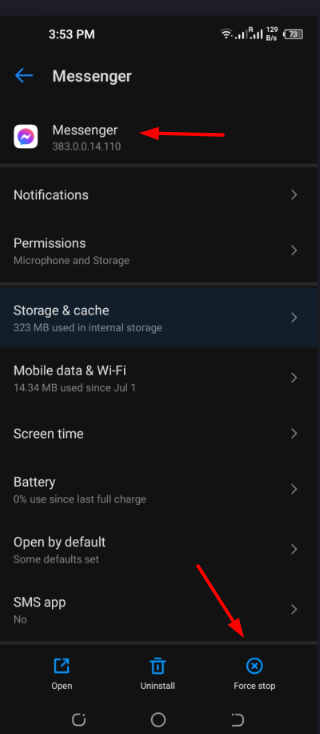
7. Force stop messenger
You may force-quit the Android Messenger app and start again. You are restarting the Messenger application to eliminate bugs.
- Press and hold the Messenger app icon to see the app’s information menu.
- Tap the Force stop button at the bottom, and you’re all set.
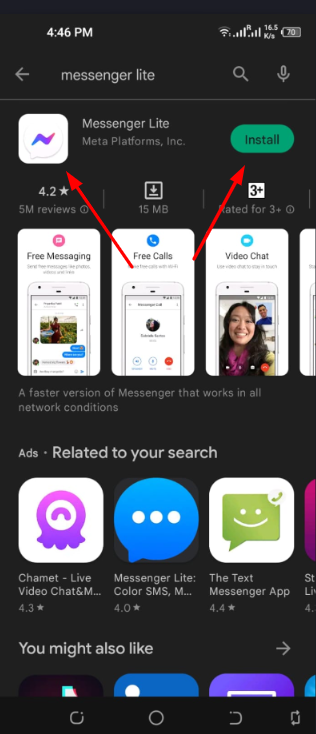
8. Use the app’s Lite Version
The lite version of the Fb Messenger application provides a basic method of accessing Facebook. It functions identically but offers fewer features.
To install Facebook Lite, follow these steps:
- Visit the Google Play store and install Facebook Messenger Lite.
- Enter your user ID and password during the installation procedure.
- The app should function as if it were brand new. Now you may enjoy the online picture and media sharing.
9. Return to a previous version of Facebook Messenger
Here are the steps:
- Uninstall Facebook Messenger.
- Go to APK Mirror or any other APK provider and search for Facebook Messenger.
- Download the APK file. We suggest that the APK is less than two months old and not a beta version.
- When asked, run the APK and authorize the installation of third-party applications on your smartphone.
- Empty your browser’s cache and data, and then login in with your credentials.
10. Access Facebook from your web browser
All that is required is the following:
- Please visit www.facebook.com.
- Enter your username and password, then press enter.
We hope you haven’t forgotten how to use Facebook in the traditional manner. Use a PC to access your media and files.
Conclusion
If Facebook Messenger is still crashing or unable to send photos from your Android, iPhone, or iPad, there may be a technical problem, such as a malfunctioning internet connection, a big file size, etc.
Occasionally, some customers cannot share pictures using Messenger on their PC, although this is quite rare. If this occurs, it could be due to your browser’s cache, a connection issue, a media size issue, or because of a technical issue with the photographs.
